This guide covers the complete process from account registration, ordering a VPS, payment, and managing your VPS including Linux SSH and Windows RDP access.
Step 1: Visit Our Website and Register
Visit our main page to start. Click Sign Up to create a new account.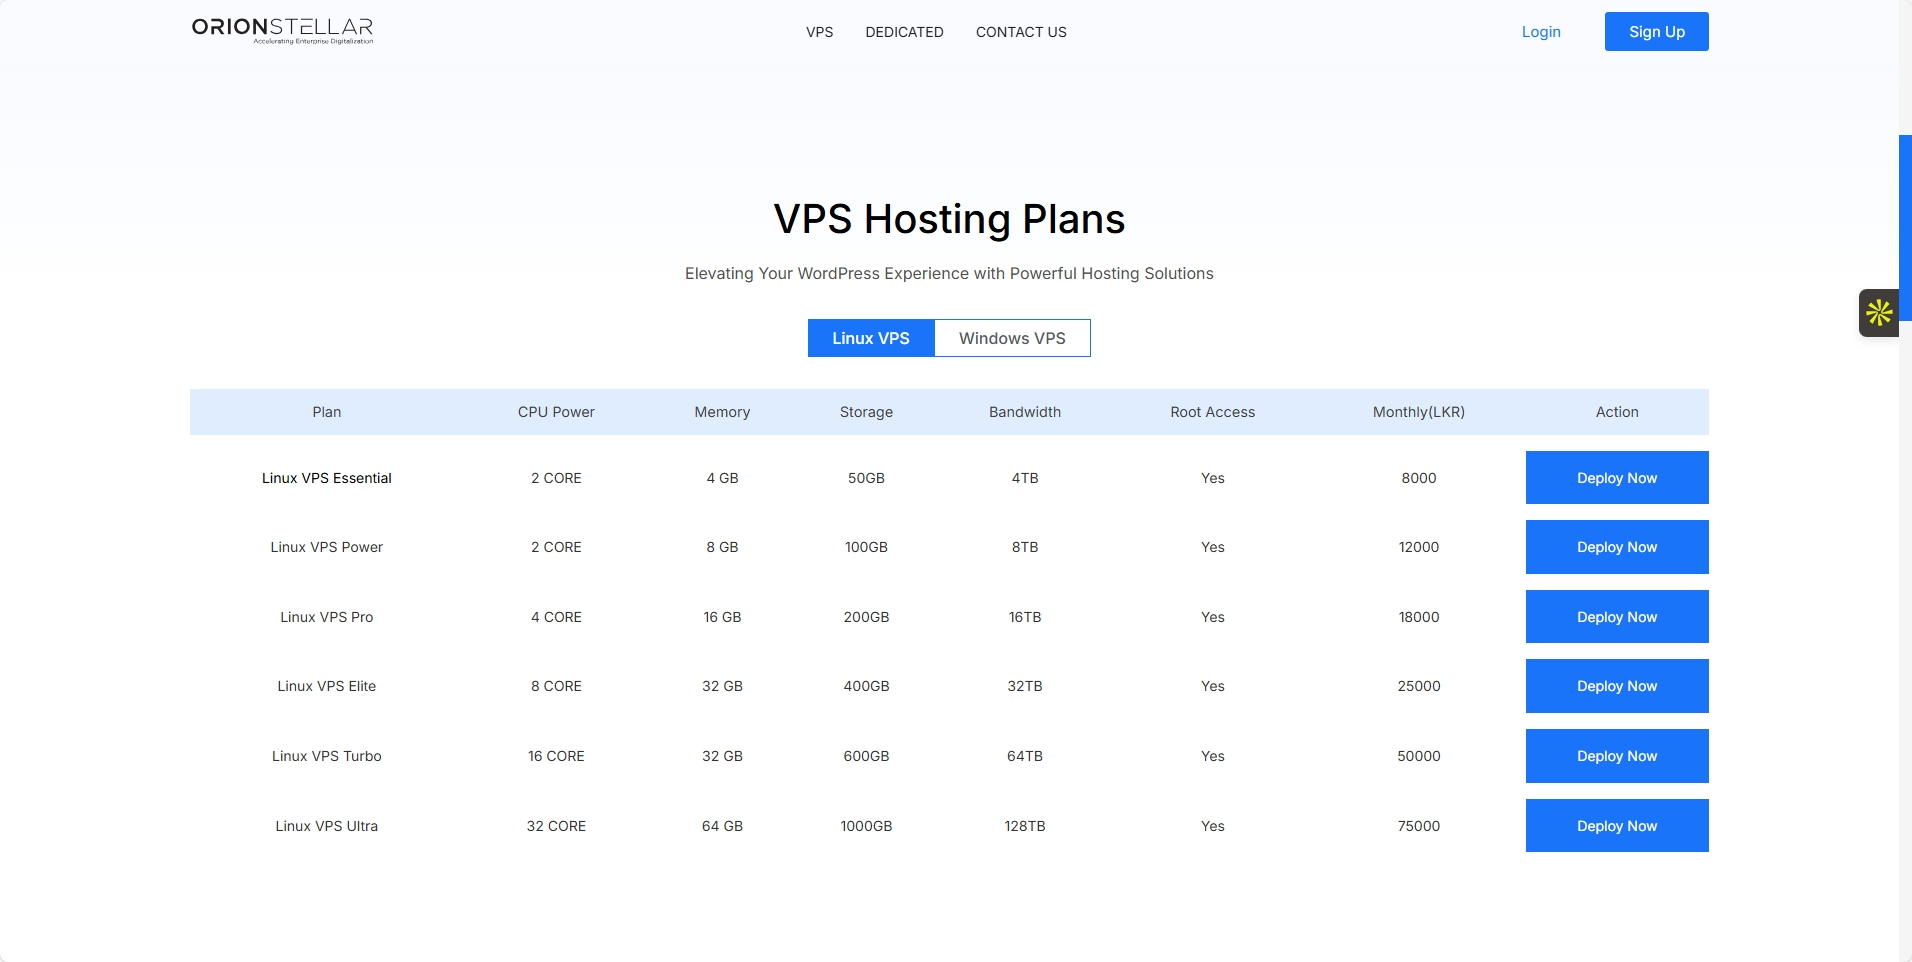
Fill out your personal and billing information and set a secure password. Don't forget the spam bot verification code at the bottom.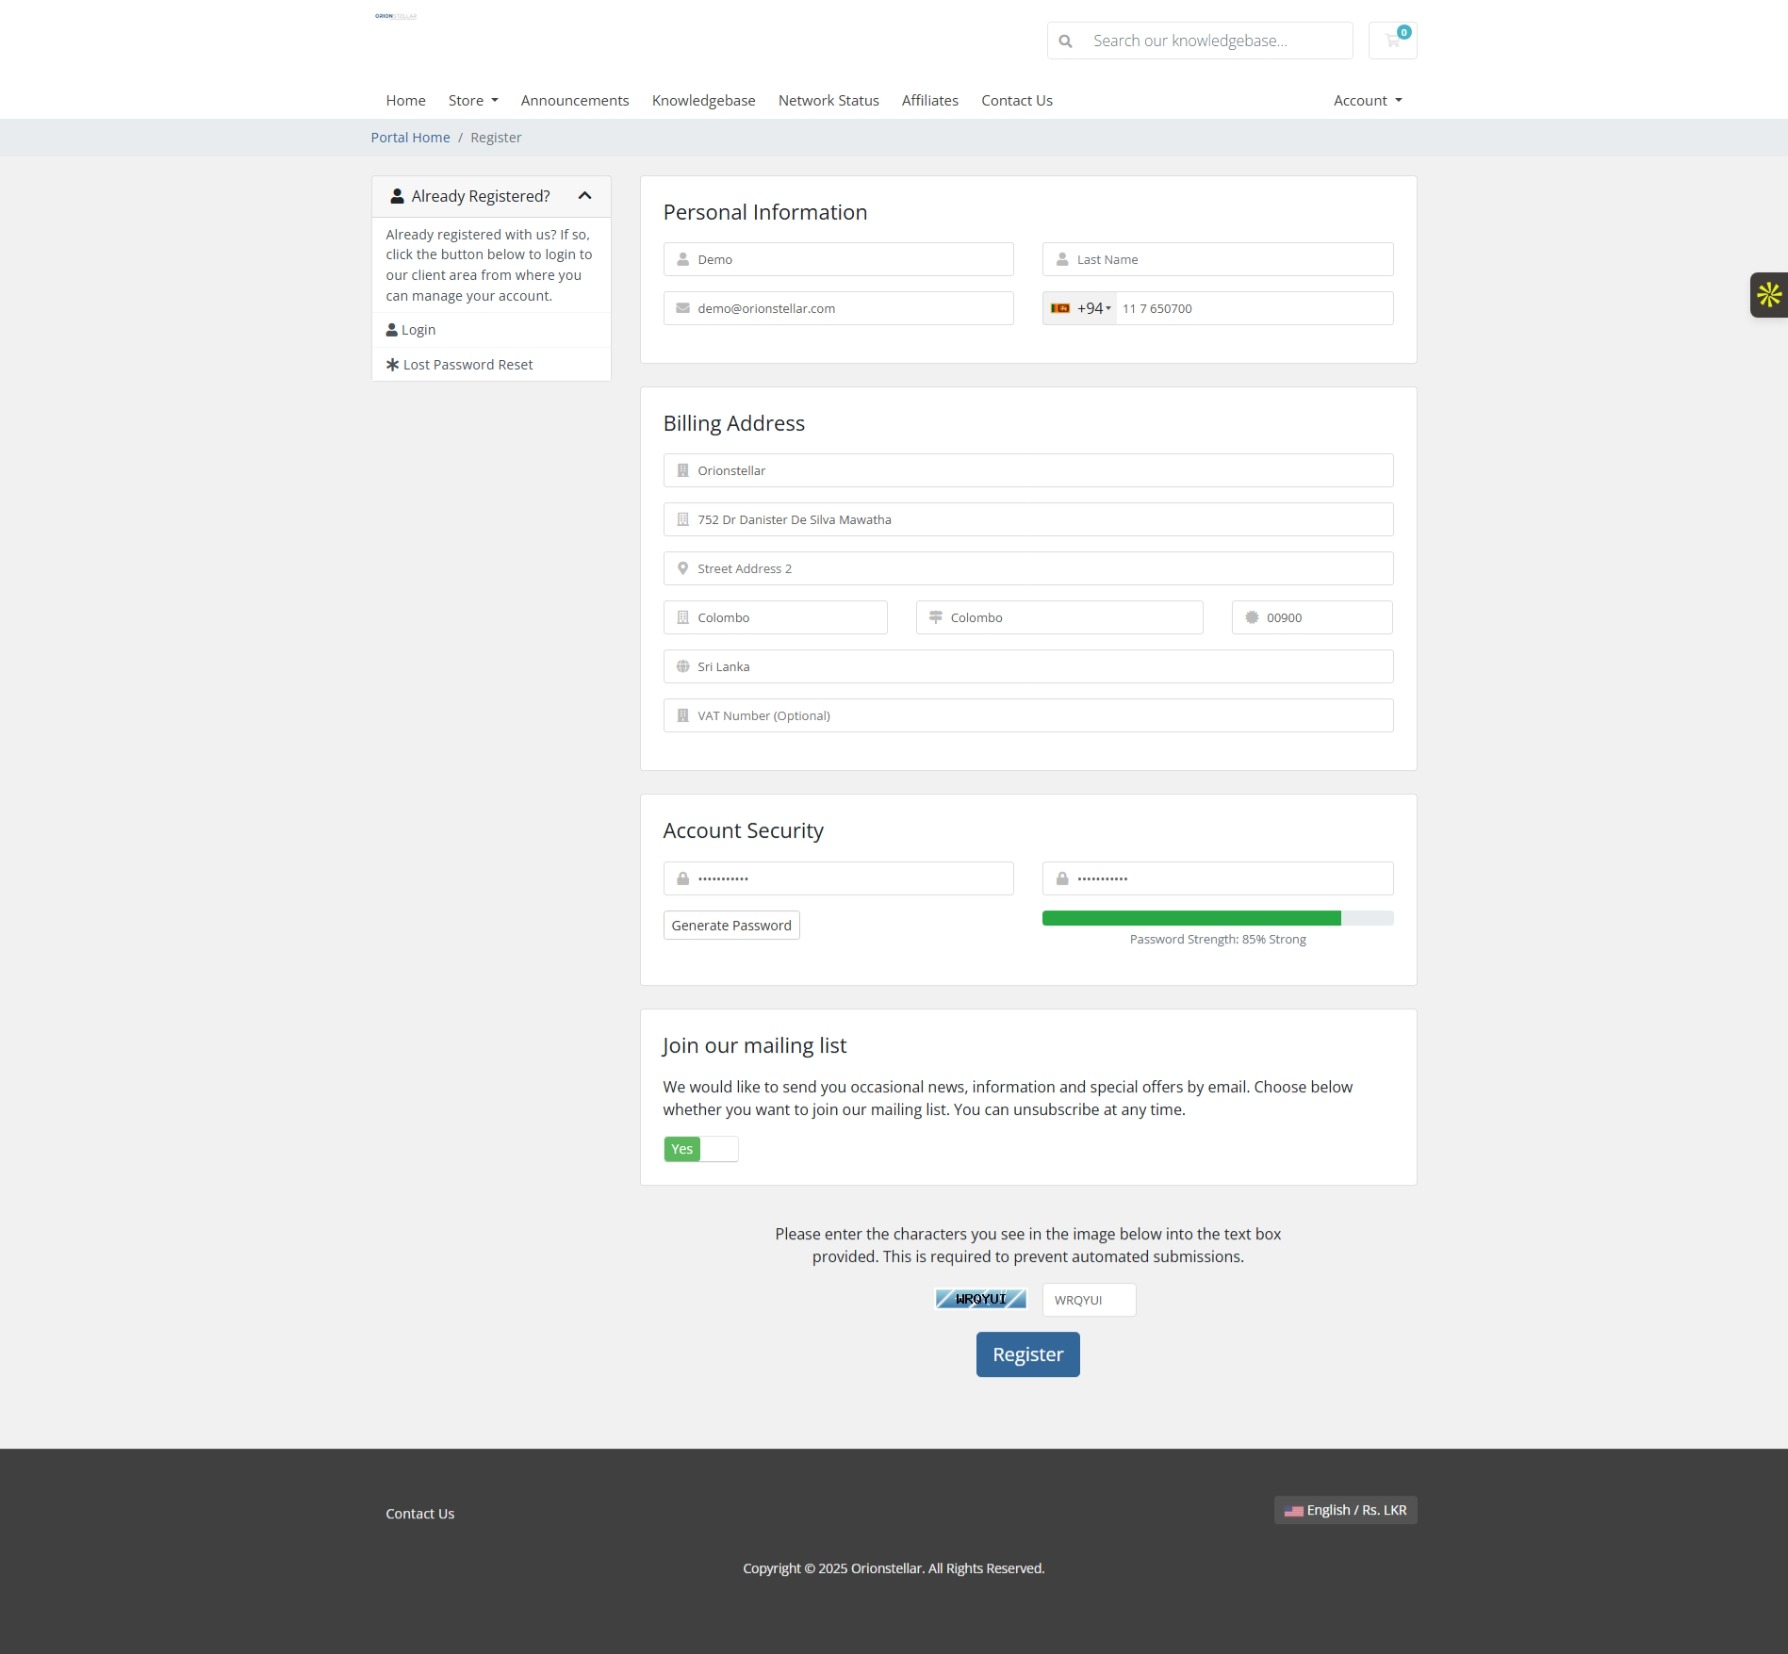
Step 2: Access Your Client Dashboard
After logging in, you will land on the client dashboard.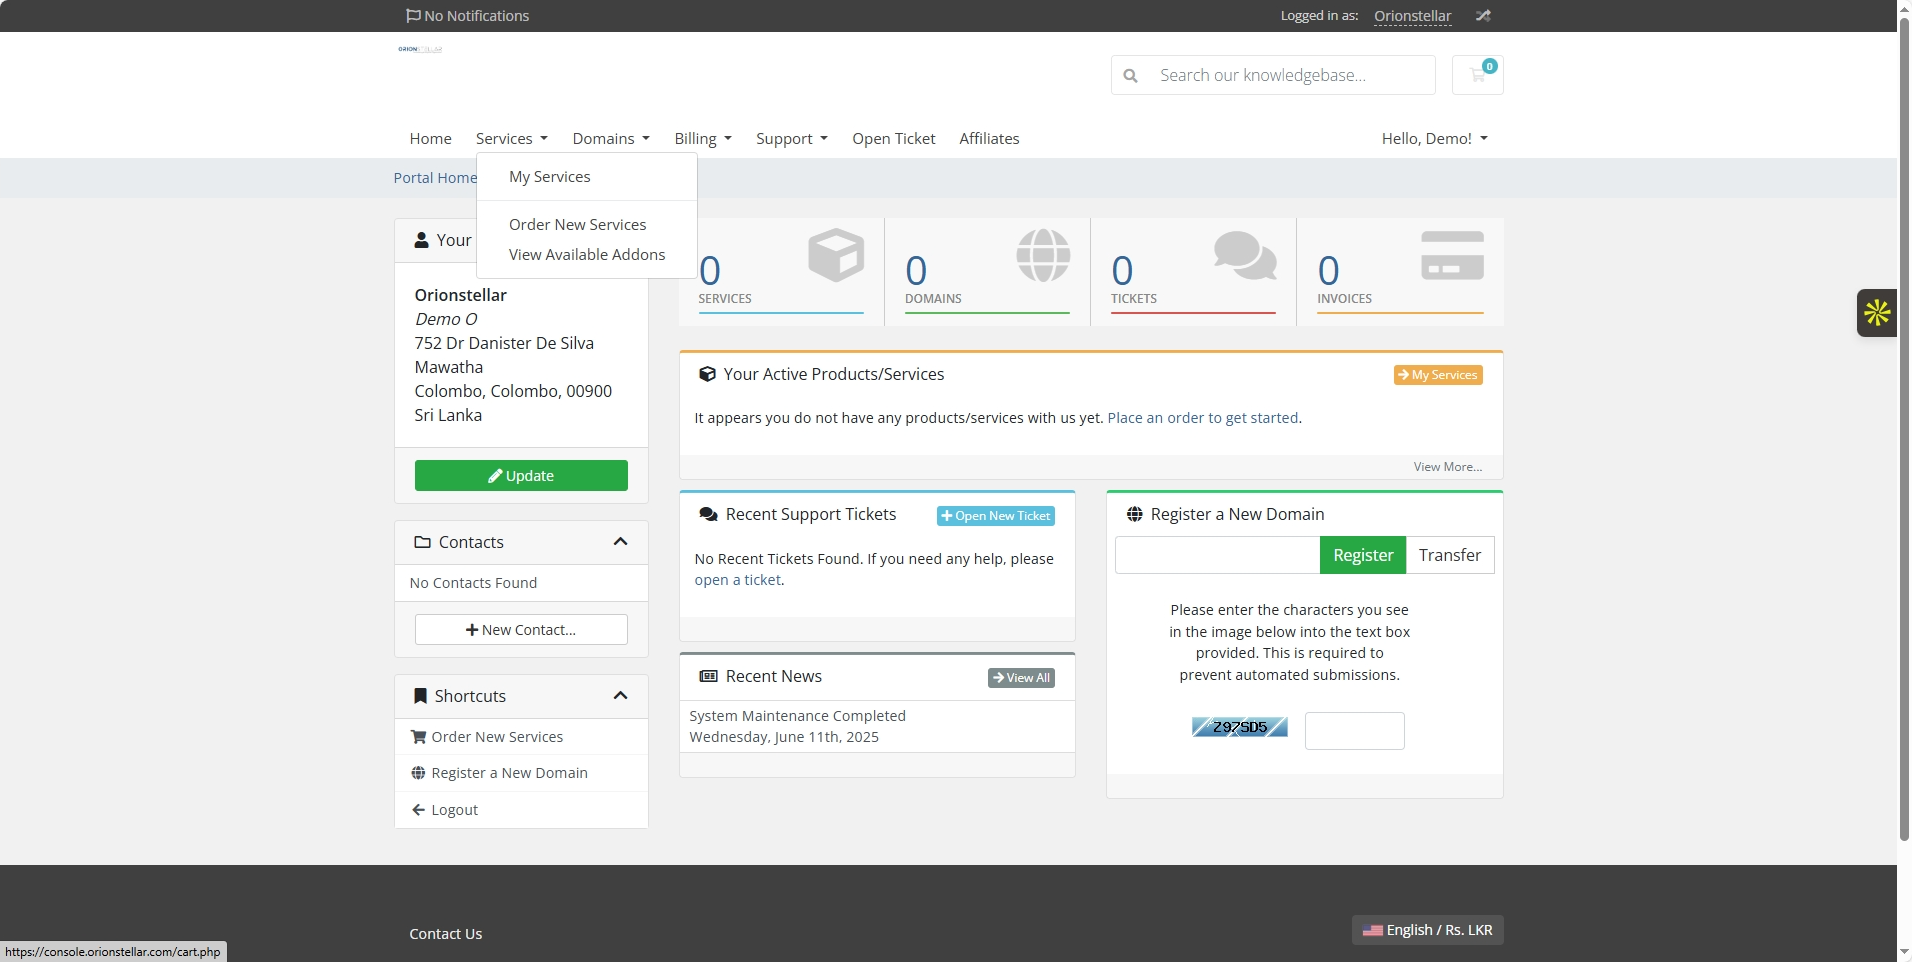
Go to Services > Order New Services to start ordering your VPS.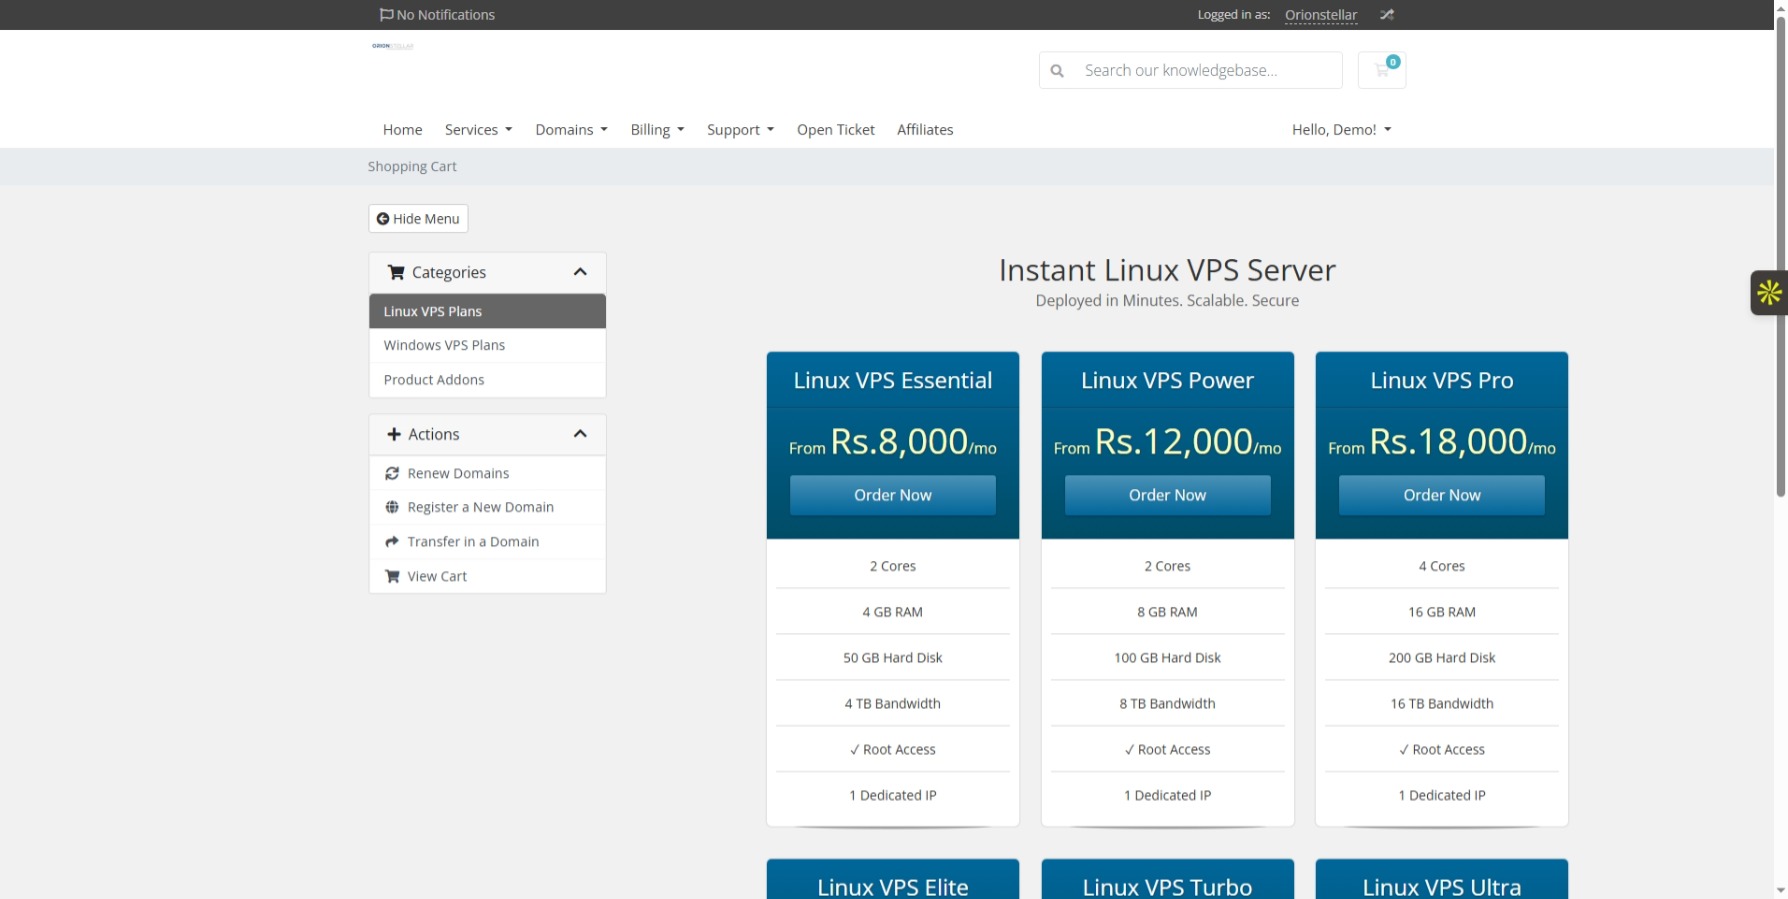
Step 3: Choosing Your VPS Plan
Select the VPS plan you want. Click 'Deploy Now' on your chosen Linux VPS plan.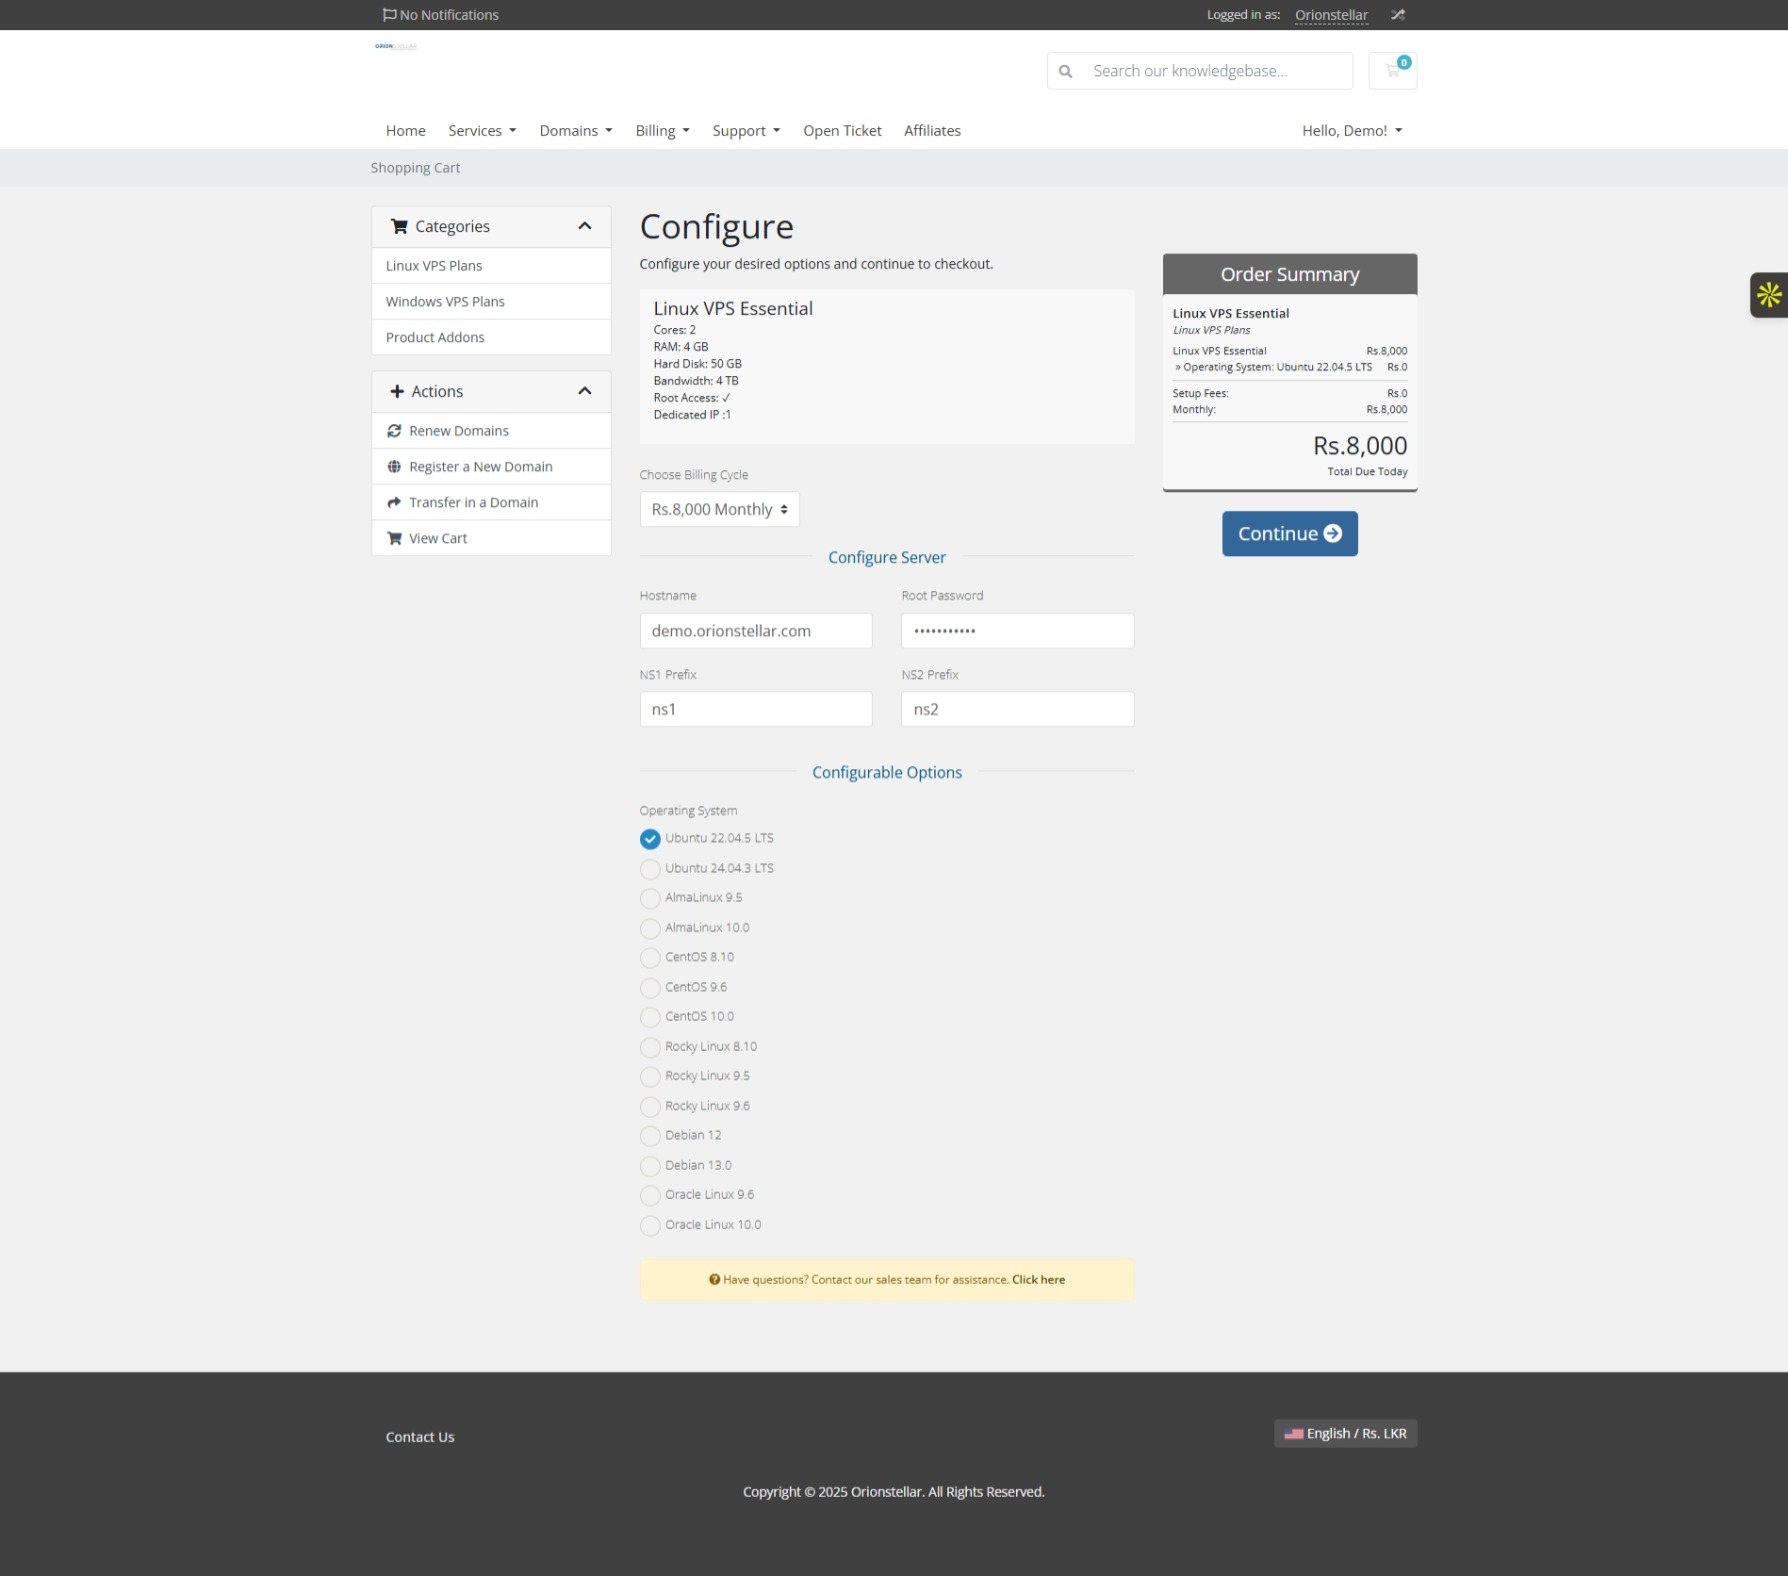
Fill in the VPS configuration details, including hostname, root password, and DNS prefixes (NS1 and NS2). Defaults are set automatically.
Choose your preferred operating system from options like AlmaLinux, Ubuntu, Rocky Linux, Oracle Linux, Debian, etc.
Click Continue to proceed.
Step 4: Checkout and Payment
In the Checkout page, confirm your details and select payment method. Bank Transfer is the default method.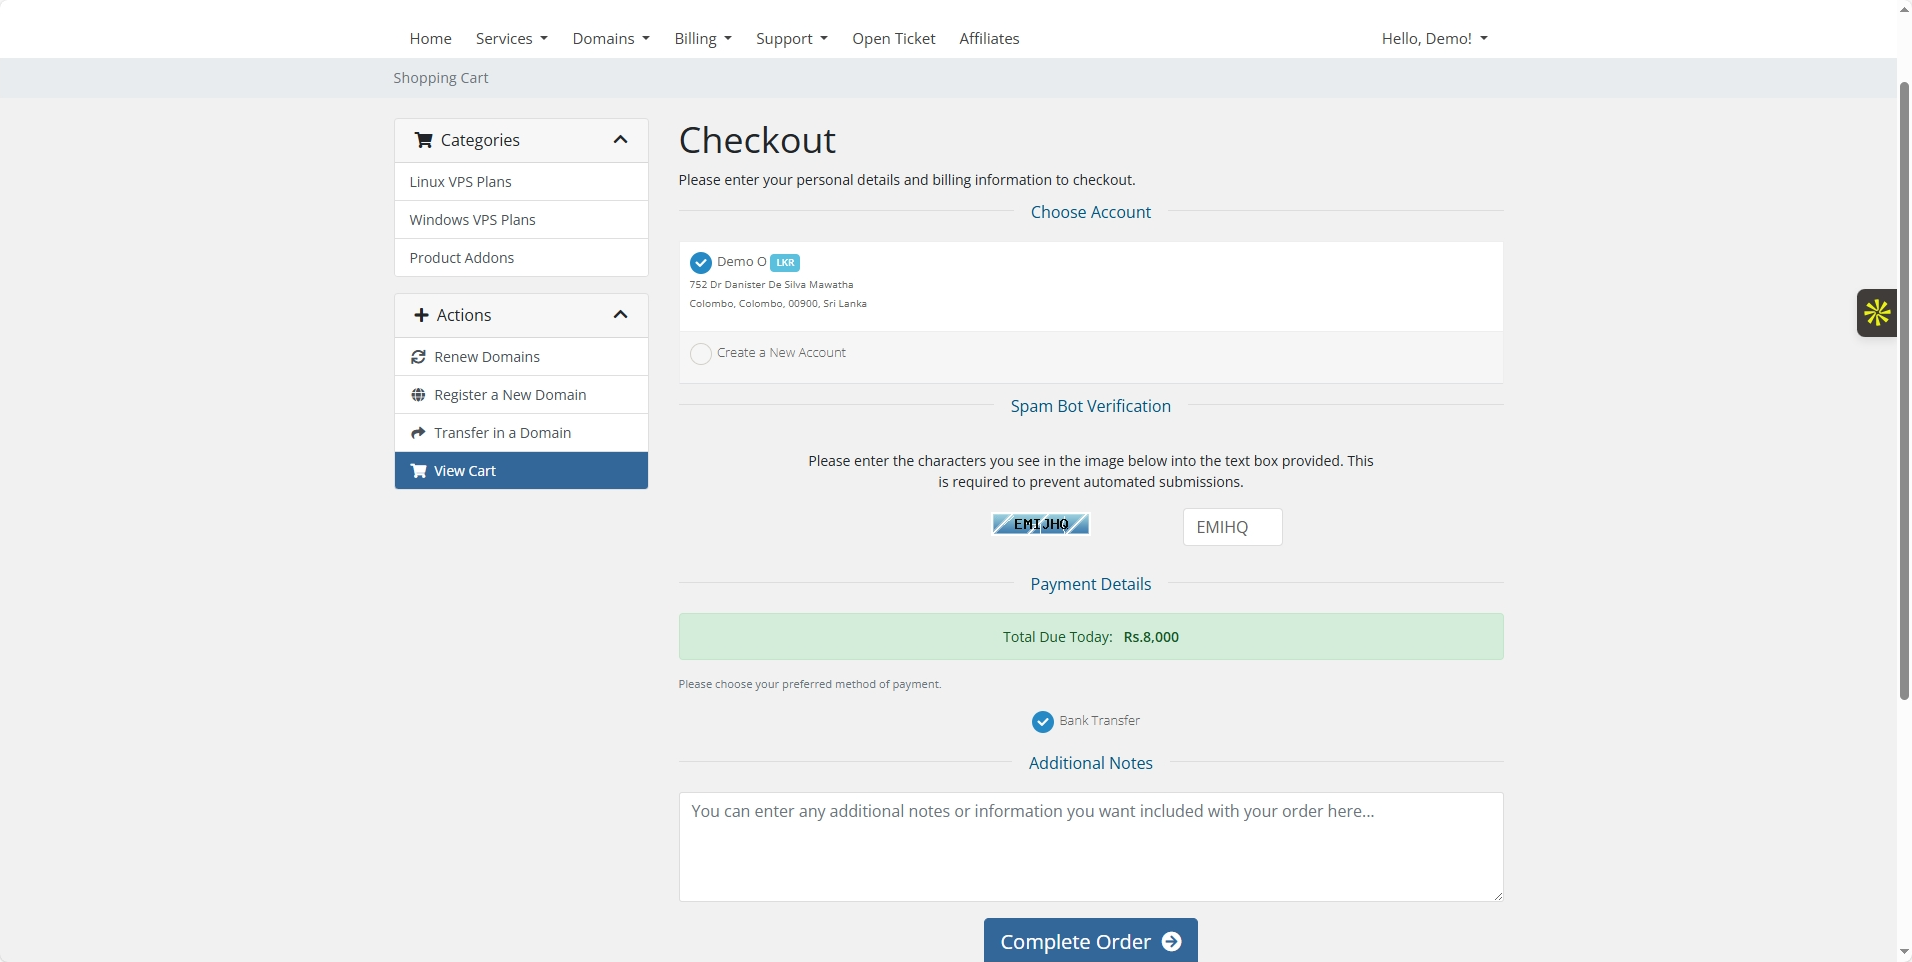
Complete the order.
You can download your invoice which contains bank details for payment.
Step 5: Order Status and Dashboard Access
Before making payment, your service will show on your dashboard as pending.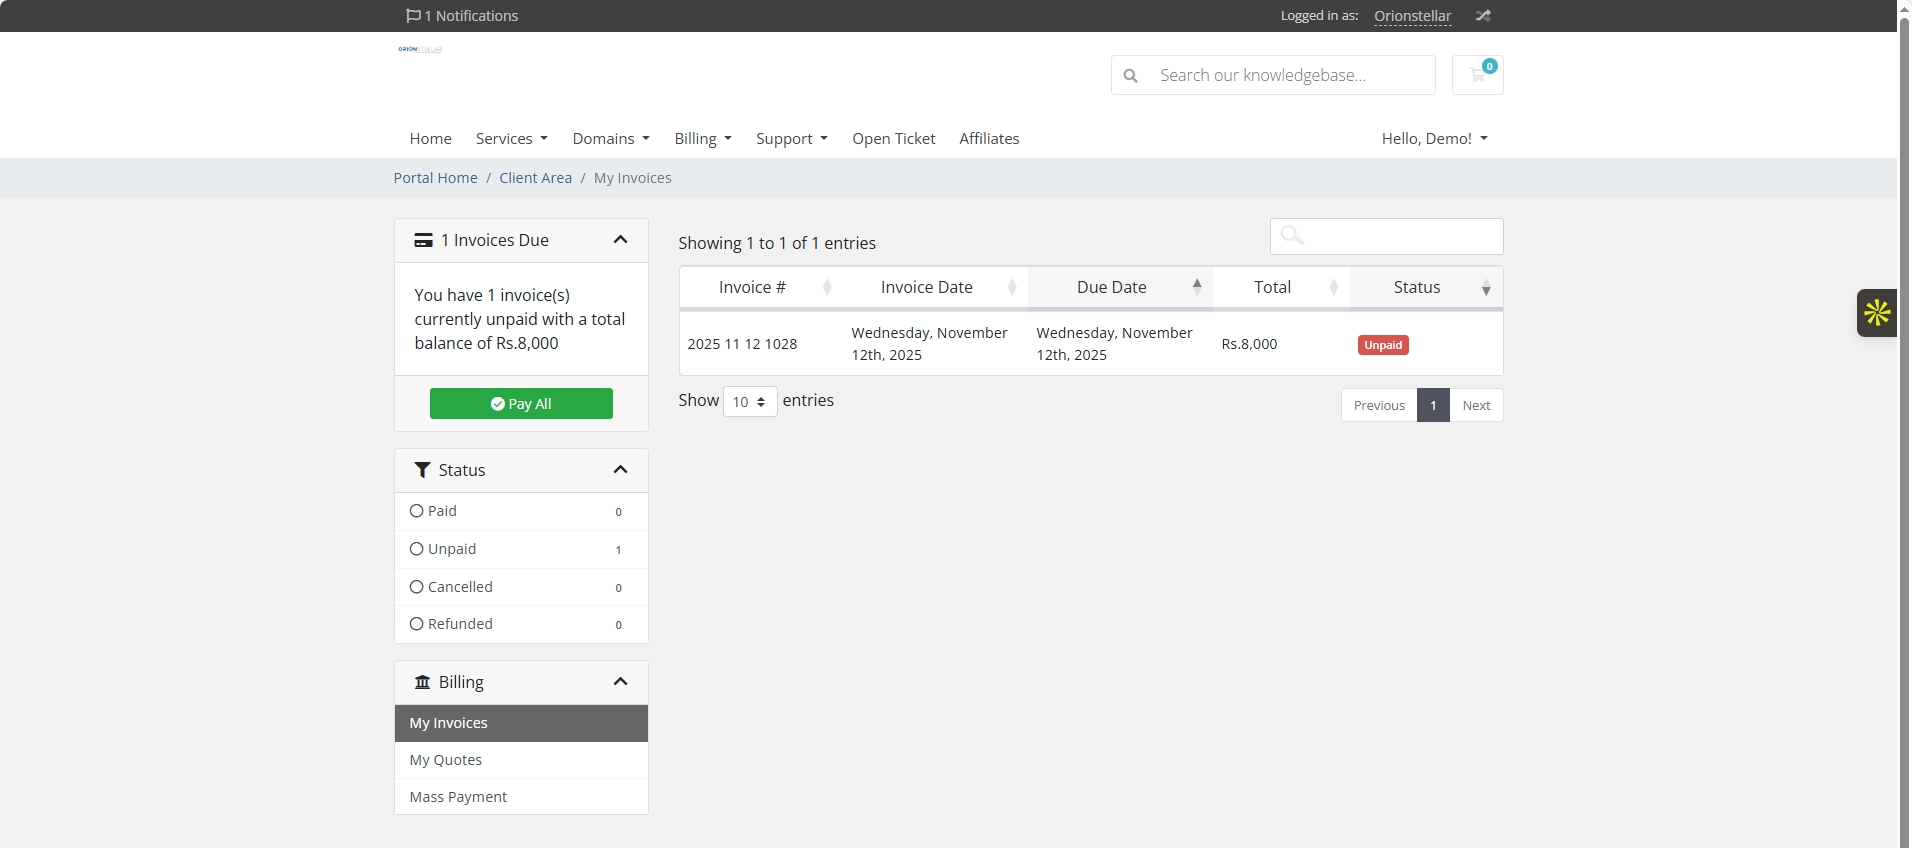
After your payment is confirmed, the service status updates to Active.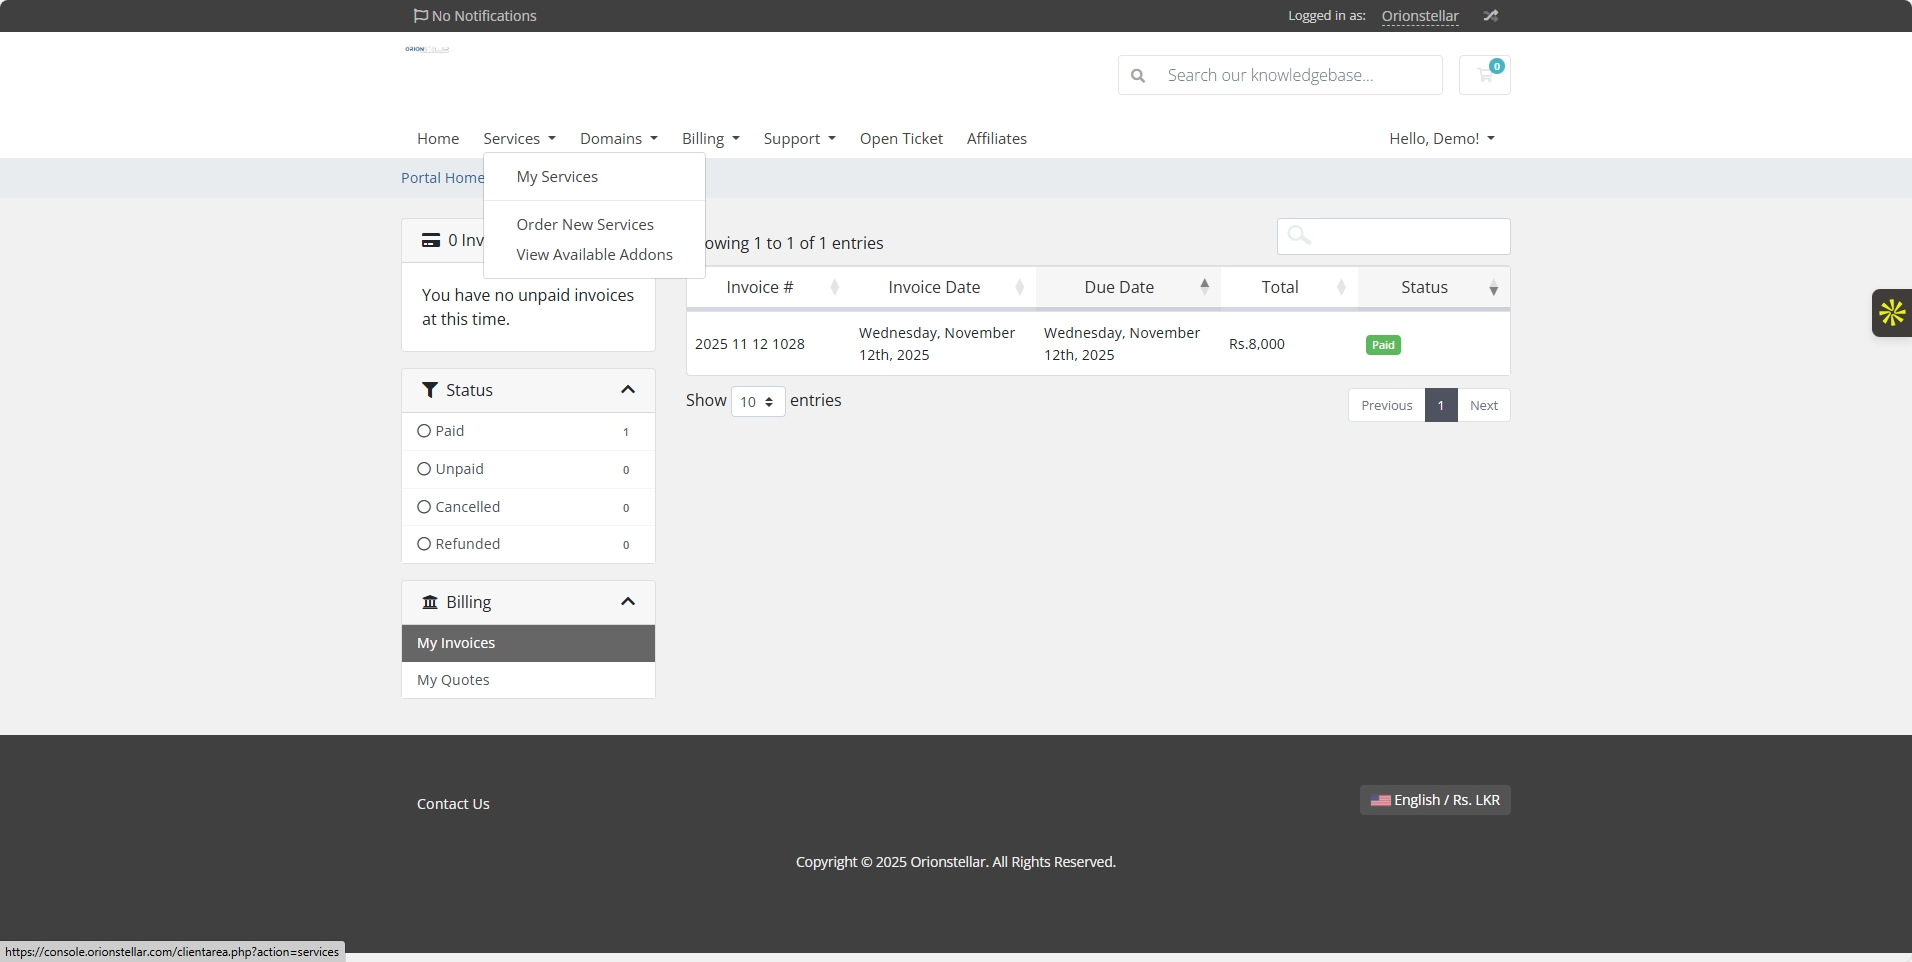
Click on your product to access the VPS service dashboard.
Step 6: Managing Your VPS
On your VPS dashboard, you can monitor usage, bandwidth, and CPU. Actions like Start, Stop, Reboot, Power Off, Upgrade/Downgrade, and Change Password are available.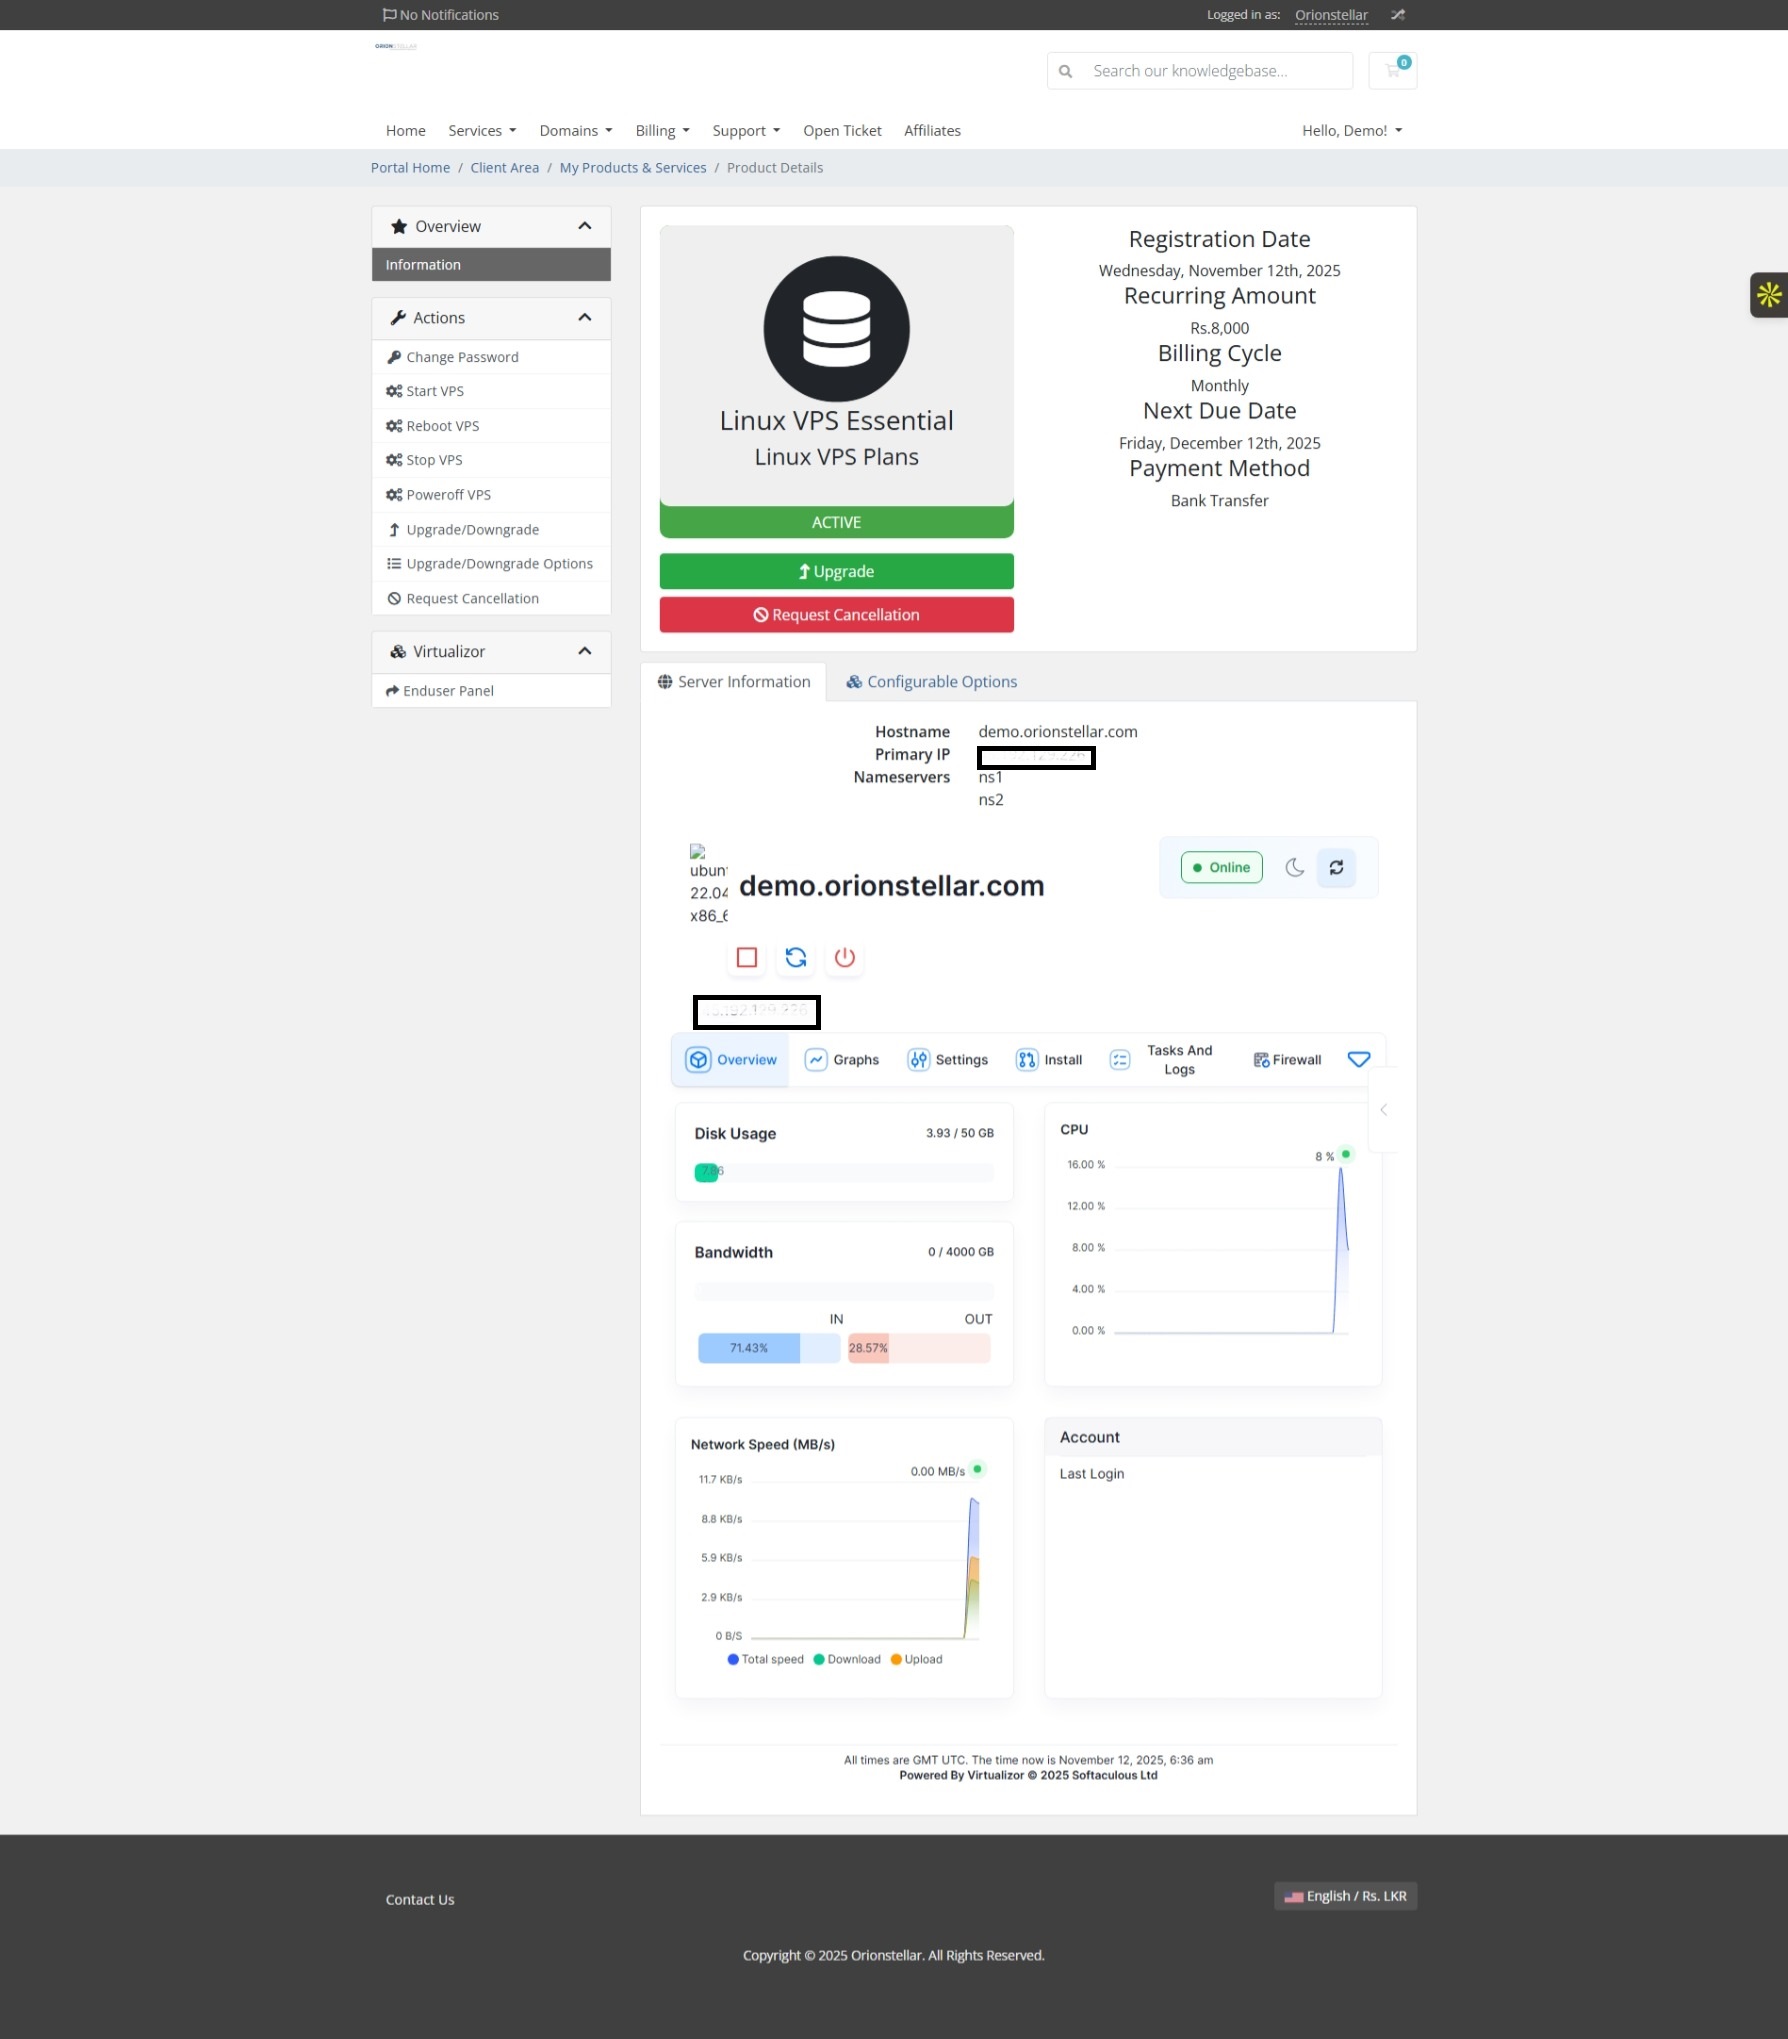
Step 7: Accessing Your VPS via SSH (Linux)
Use PuTTY or any SSH client to connect using the VPS IP address and root credentials.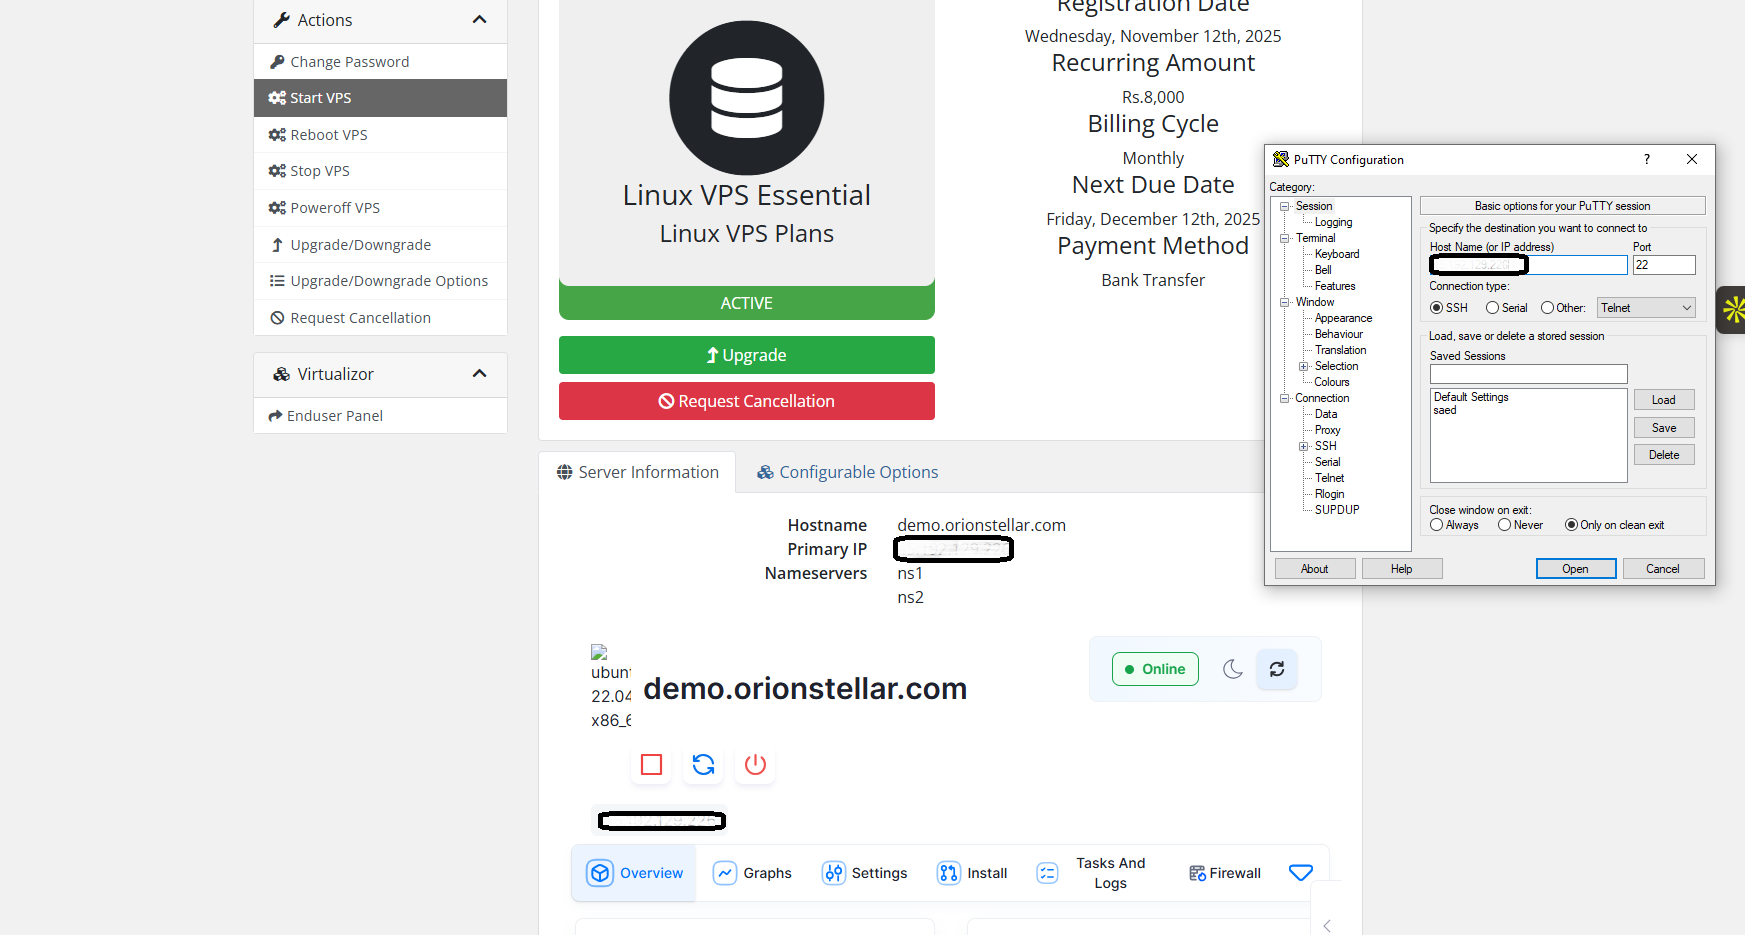
Upon first connection, accept PuTTY's host key to continue.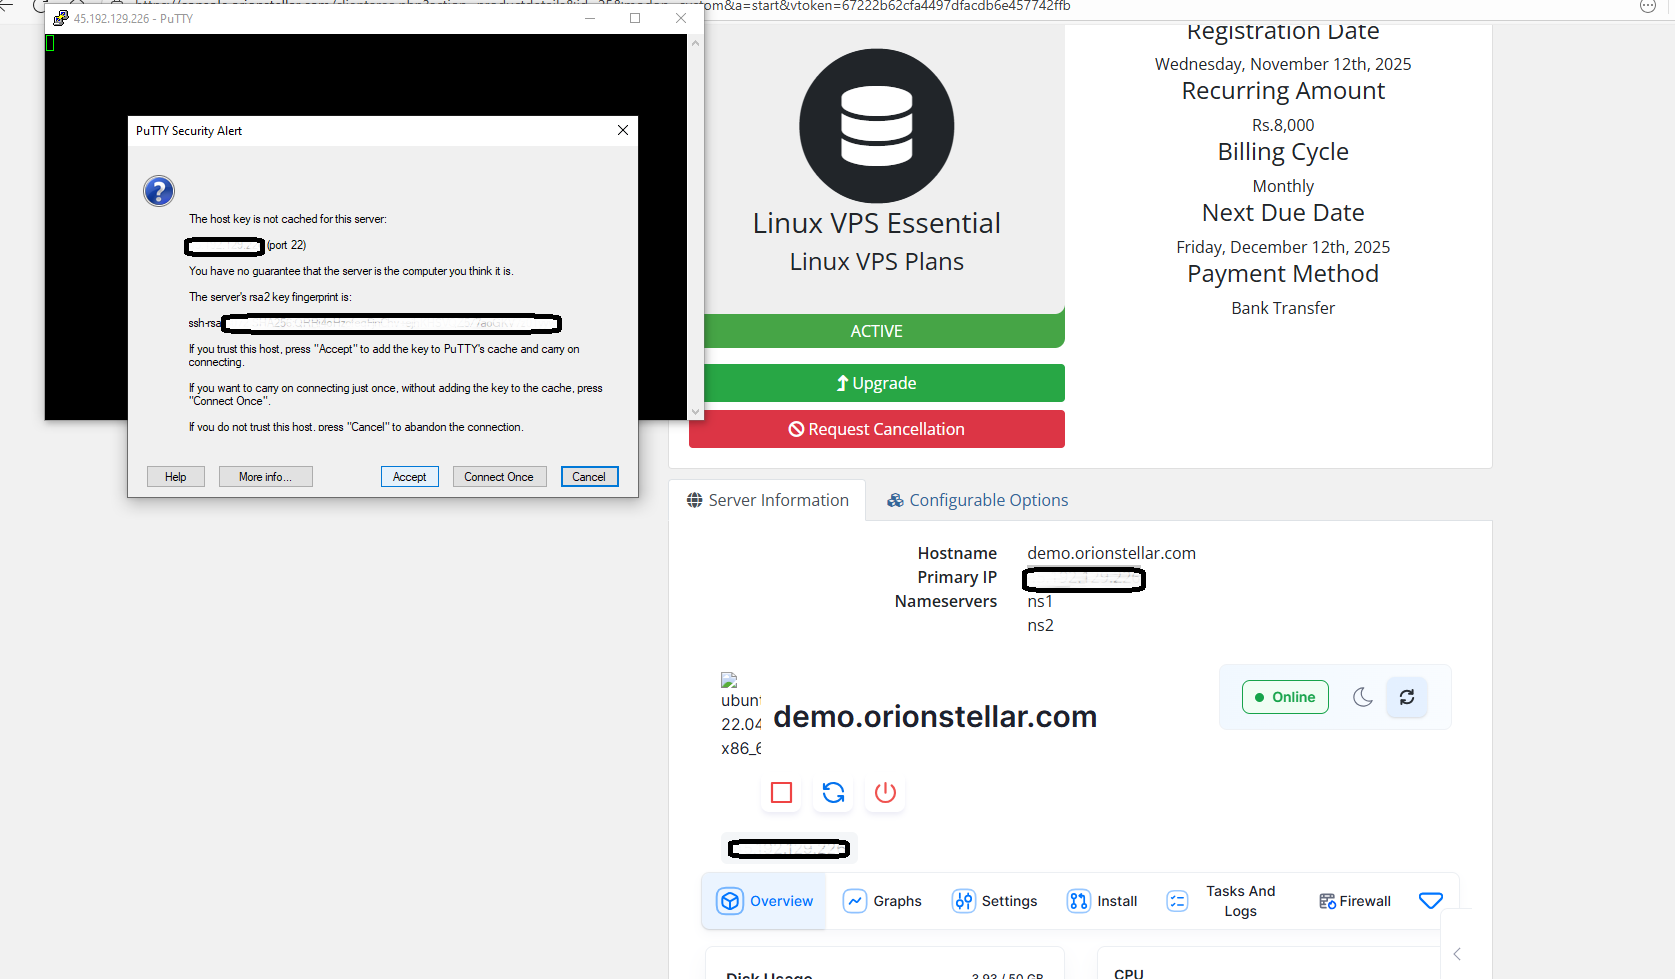
Once connected, you will see the Linux command line prompt.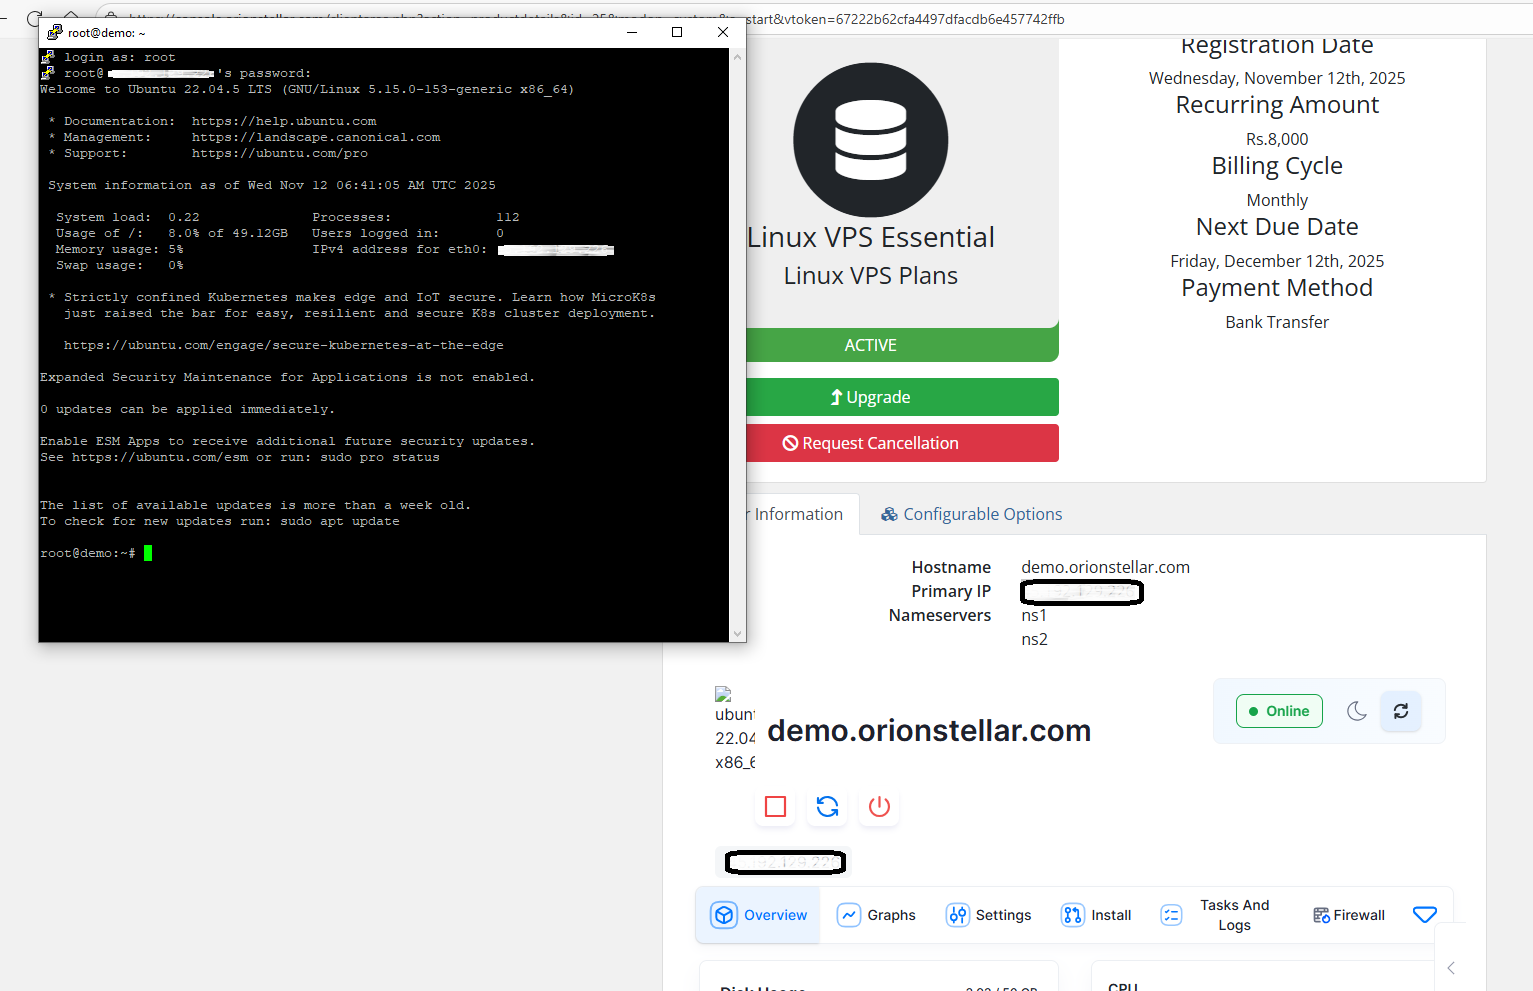
Additional Notes
-
Always keep your root password secure.
-
Use the client dashboard to reboot, power off, or upgrade your VPS as needed.
-
Save invoices and payment receipts for your records.
